
Monica says:
Oh how we love strawberry season! It’s time to pick the juiciest berries that we can find!
Do you think we did just that?

Our sweet girl, Emily, and my sister Maria (her granny), and I went to a little farm to find the best berries we could. This time we were smart and each wore disposable gloves….boy, they made all the difference!
Highly recommend this move!
Anyway, after about an hour, we had filled our vessels to capacity….here was my personal stash!

When we got home, I researched the best way to keep these beauties fresh and long lasting. Well, I found advice from a blog, Momables and I can say it was the best advice ever!
Following her instructions below, even today, after 8 days, my strawberries are still fresh and plump like they were just picked!
Washing Fresh Strawberries
- 8 cups water
- 2 cups white vinegar
- Drop dish detergent
- Place above in salad spinner
- Clean strawberries in batches if too many
- Swish them around in liquid and then rinse
- Place on towel lined cookie sheets to dry
- Store them in sealed container lined with paper towels when completely dry
- Leave a smidge open on container so they don’t get too much moisture!
NOTE: I used 9 x 13 glass dishes with paper towels and only covered top layer with paper toweling; stayed perfect! And depending on the amount of strawberries you pick, you may have to do this several times.
I also decided to make my own strawberry filling for the pies since I wanted to eliminate some of the sugar content, so I followed this recipe!
Fresh Strawberry Filling
Note: This recipe is for ONE pie
- 1 quart fresh, organic strawberries
- ½ cup sugar
- ½ teaspoon salt
- ½ cup water
- 1 ½ tablespoon cornstarch
To make the filling:
- In a sauce pan, put 1 cup sliced berries, ½ cup sugar, salt, and ¼ cup water. Bring to boil.
- Cook 3 minutes. Remove from heat.
- Mix cornstarch and remaining water. Add to sauce pan.
- Return to heat. Stir until thickened, about 2 minutes.
- Allow to cool.
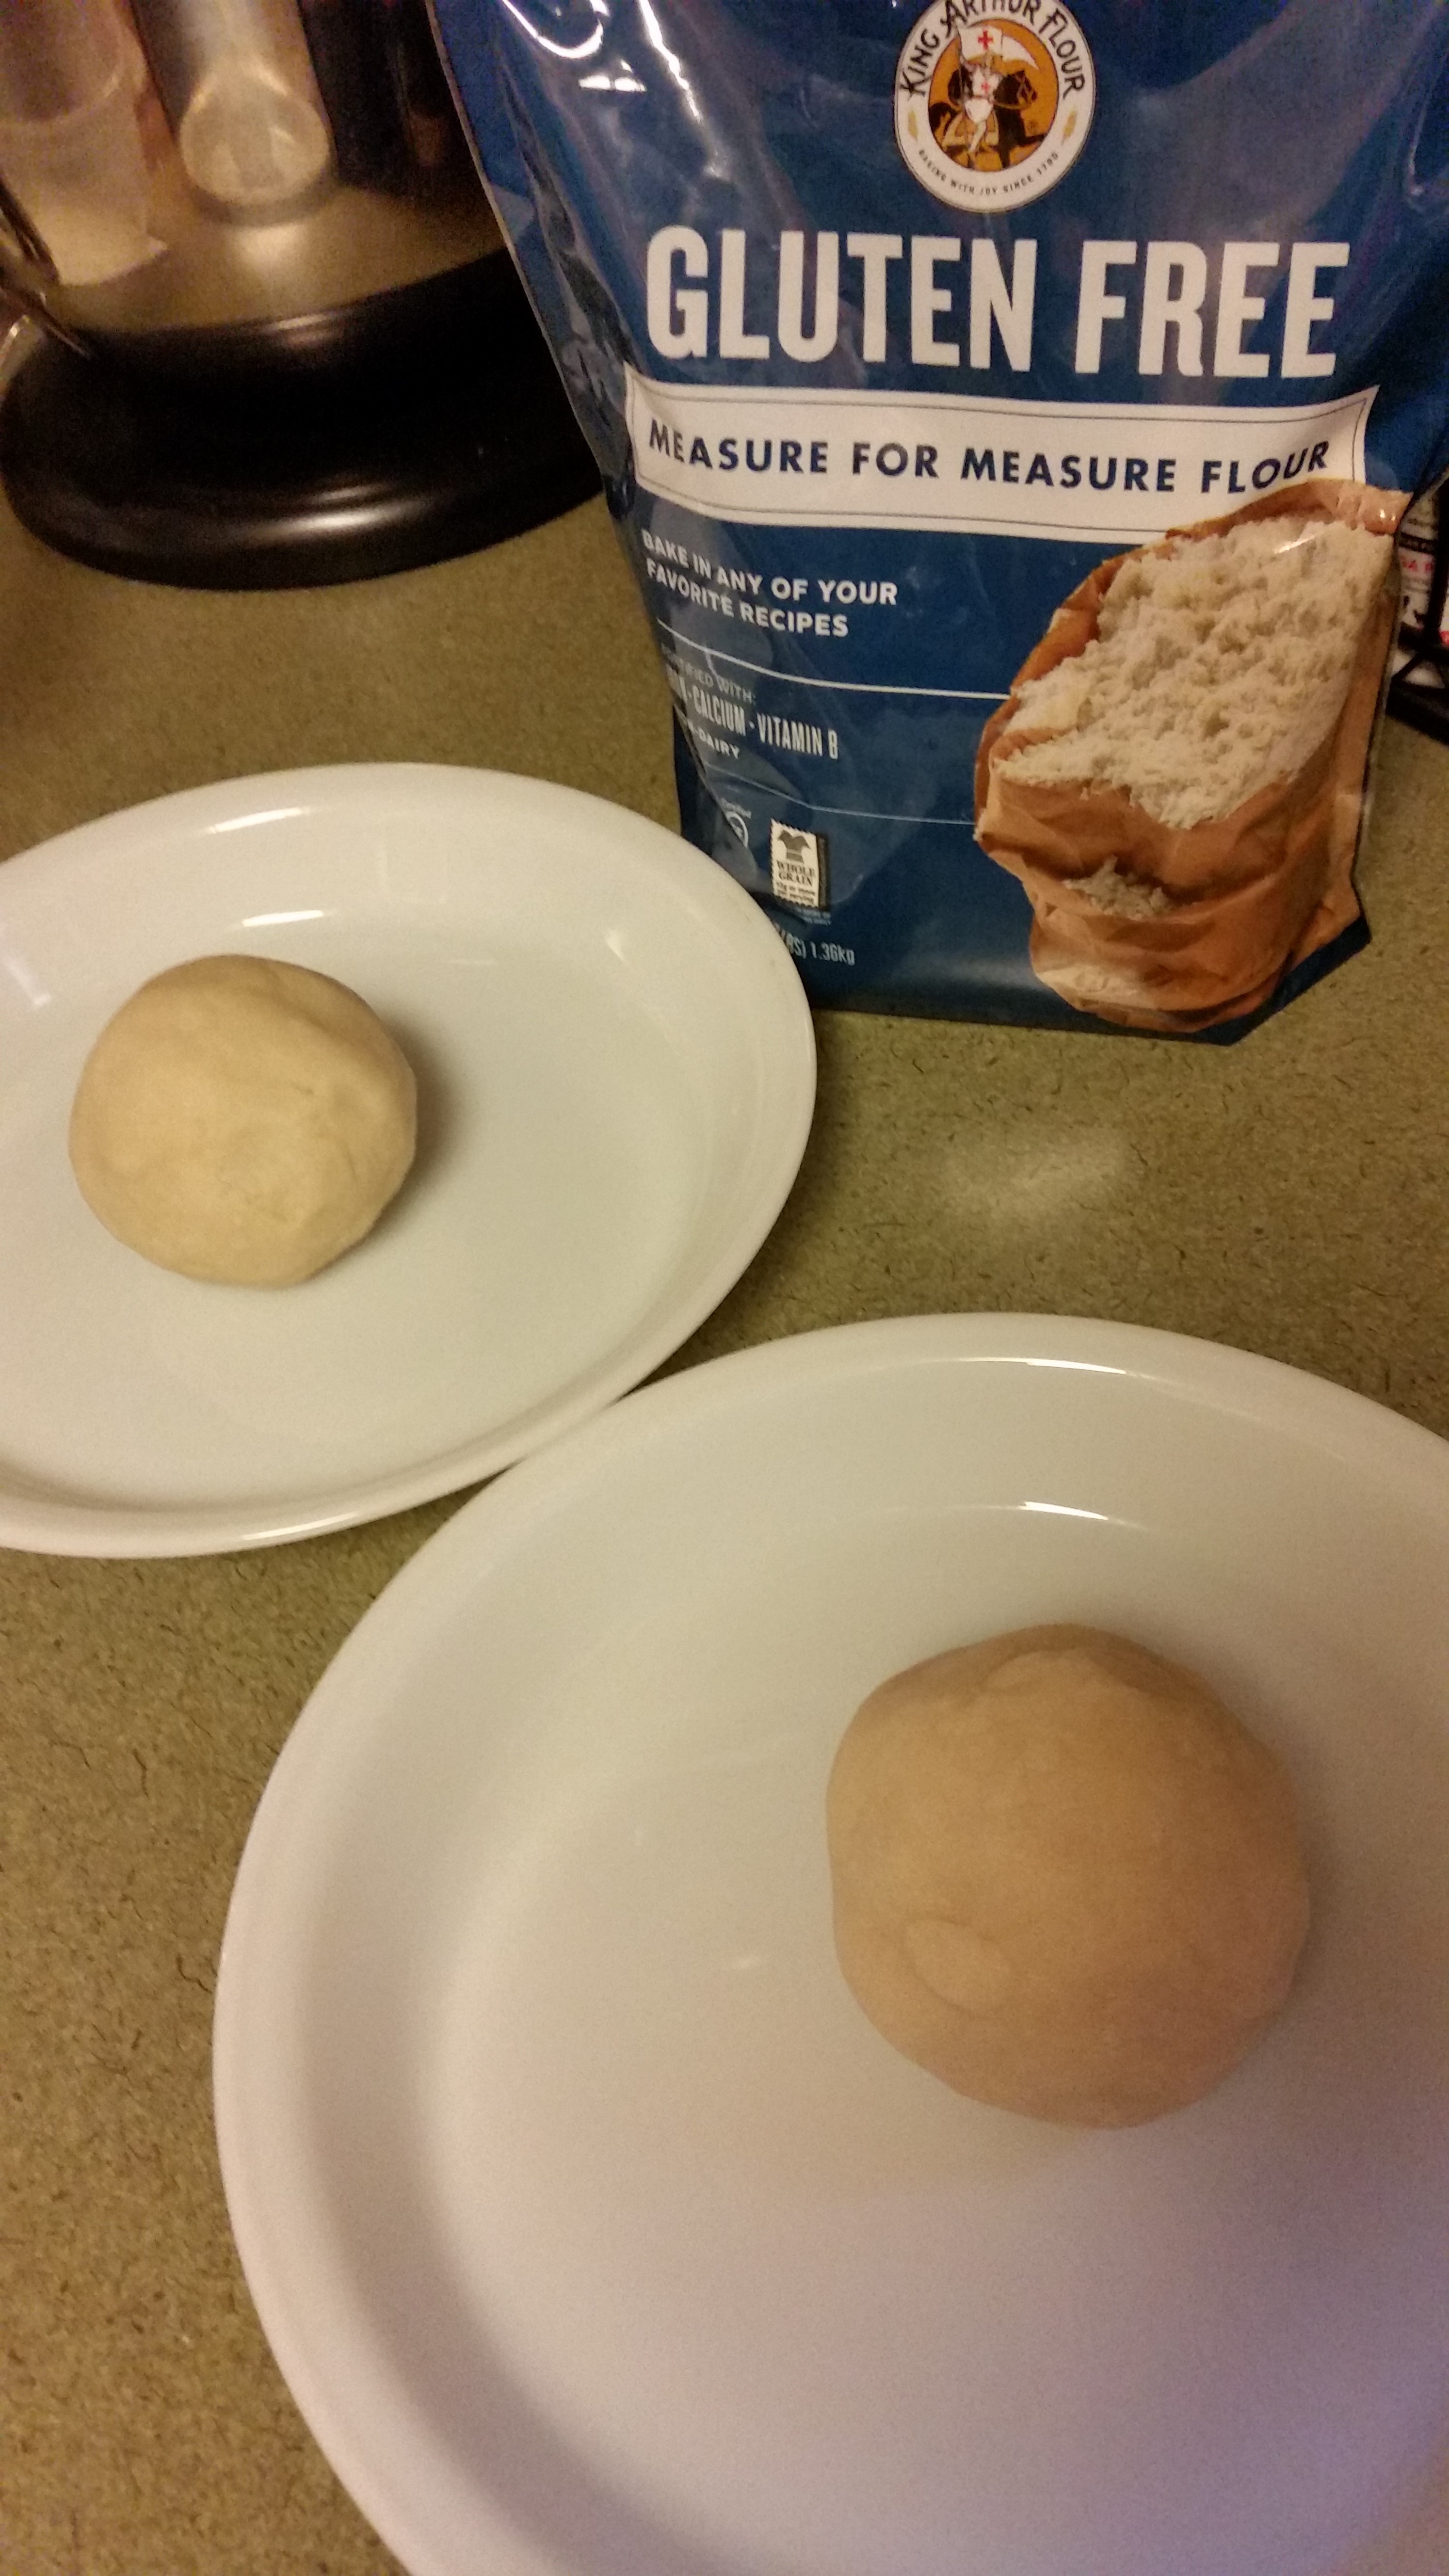
Meanwhile my official pie crust maker and our biggest gluten free lifestyle supporter, my hubby, began to make the crust. We decided to try a gluten free blend and chose King Arthur’s Measure for Measure blend with my mother’s pie crust recipe!
Mom’s Water Whip Pie Crust
Note: This recipe makes 2 crusts (either a top and bottom, or two bottoms)
- ¾ cup shortening
- ¼ cup boiling water
- 2 ¼ cups gluten free flour (a blend of your own or any commercial blend)
- 1 T milk (Lactaid if needed)
- 1 tsp salt
Whip shortening and water with a fork until smooth and creamy. Add milk, flour and salt. Work into a nice dough ball.
Perfection!

Since you have to bake these pastry shells without filling, I cut a round of parchment
for each and filled with uncooked rice.

Baked the crusts at 375 degrees for 20 minutes and then took them out of the oven, removed the rice with parchment, and then pricked small tine marks with a fork in the bottom of the crusts.
Then I placed the crusts back in the oven for 20 minutes.
Look at these babies!

While letting everything cool (filling and crusts), I removed the stems from the strawberries.
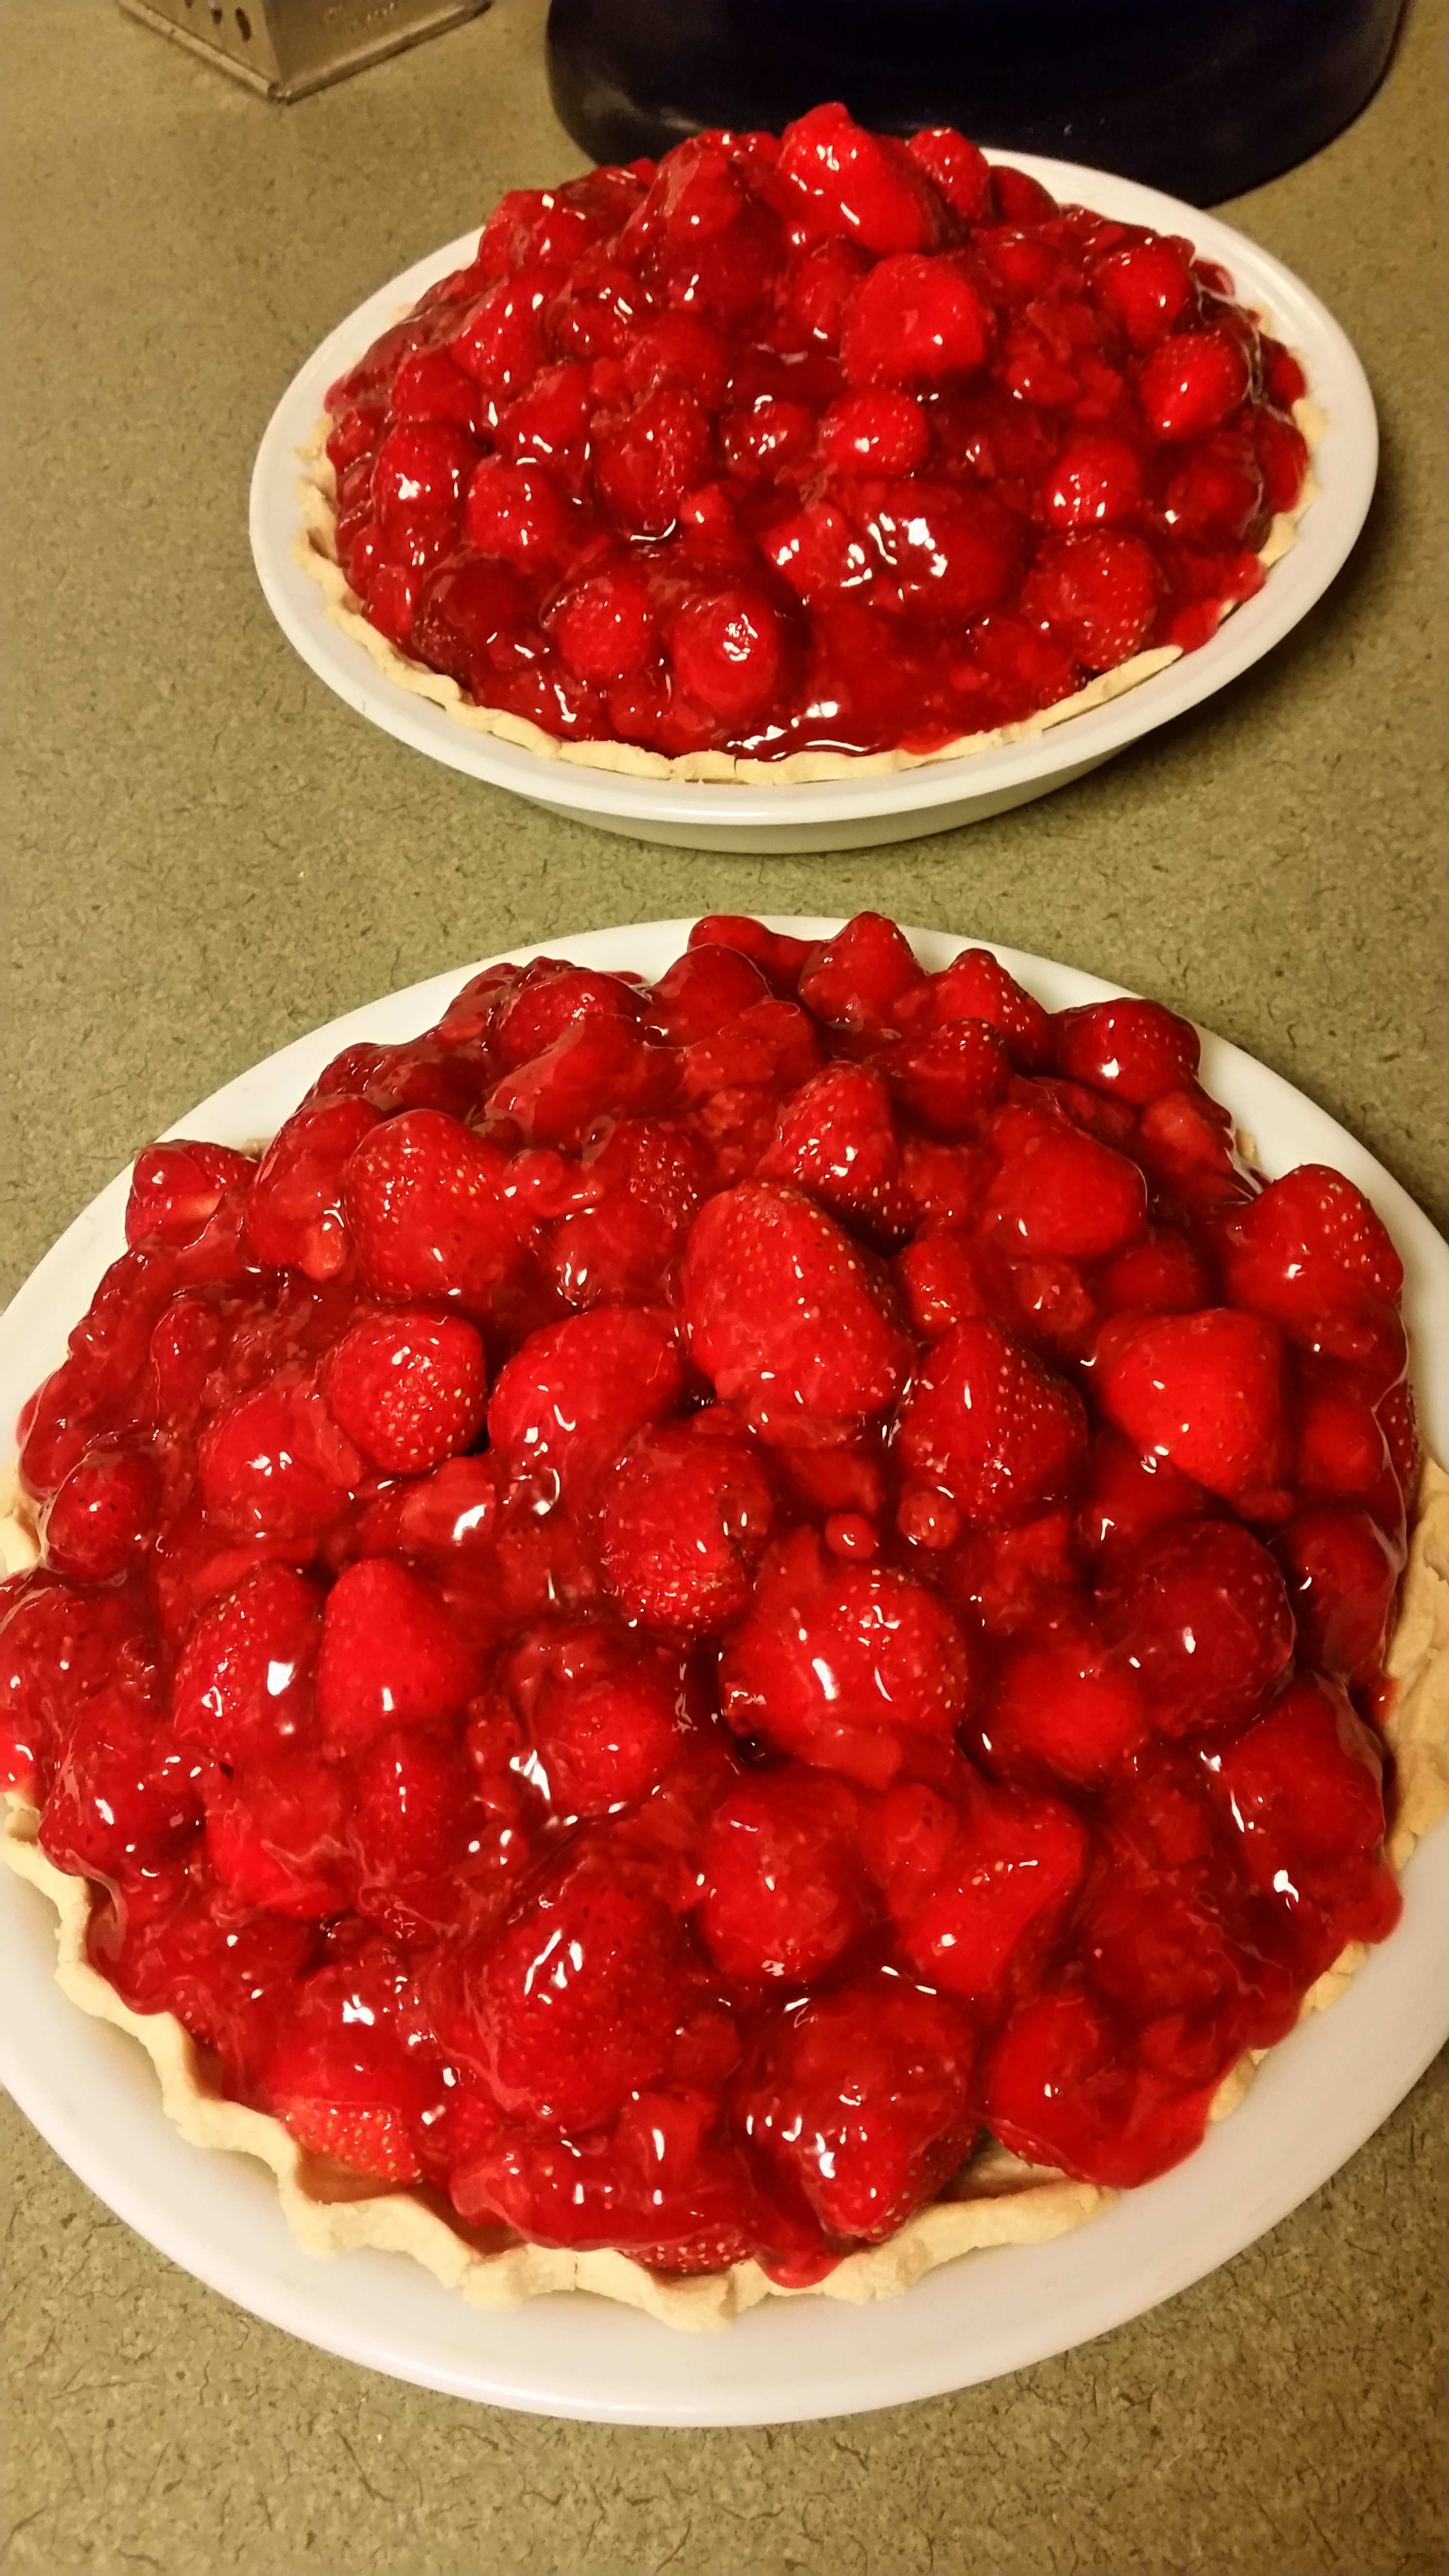
And now the best part…..filling them up with the sweet strawberries!

Once I liked the arrangement, I began pouring the filling over the strawberries. It was so thick and lovely!
Daria told me that I could have taken the filling and placed the strawberries in it to get better coverage,
but honestly, that didn’t occur to me.
That’s why she’s a pastry chef, and I’m not!!
Anyway, here is picture of our completed strawberry pies!
And the “pie maker” and “official gluten free taste tester” finally gets to dig in!

Y*U*M!
Wishing you fun picking strawberries…

…but most of all, eating strawberry pie!

Enjoy!
© 2017, Monica of glutenfreedoubletalk

