Monica says:
We have been so busy with the holidays, as I’m sure all of you have been!
Baking, cooking, cleaning….oh, why do we do it?
For our family and friends…and to enjoy these special days and each other’s company…and while it is so delicious and fun to be together, it is often just as exhausting! But so worth it!
While I made several types of cookies to celebrate Christmas, these particular delights are one of my favorites. At least they were before Daria’s and my celiac diagnosis!

Now, thinking that 13 years has passed since we ate gluten, I felt that I could figure out how to make these cookies with little to no problem…right?
Well, not so much!
This recipe, which was written down on a piece of paper in my recipe box, called for 3 cups of regular wheat flour. By the time I had a workable dough for this gluten-free version, I may have used close to double that!
No kidding!
Anyway, it was an adventure in gluten-free baking, if nothing else!
I had been at the grocery store a few weeks ago and turned down the GF aisle. I was amazed at the amount of gluten-free products that I have never tried!
We had always made our own GF flour by sifting several types of gluten-free flours together. Although I had never purchased an all-purpose gluten-free flour mix, I thought “Why not?” I placed a bag of Cup4Cup in my grocery cart!
When I found this Italian cookie recipe in my recipe box, I remembered that purchase and decided to use the pre-blended flour.
So, here is my story!
I looked at the following Original Recipe…
Combine the following ingredients in your blender:
1/3 cup sugar
1 ½ sticks margarine
3 eggs
1 tsp vanilla
½ cup orange juice
Now take the blended mixture and add the following:
3 cups flour
3 tsp baking powder
Knead thoroughly; if batter is sticky add more flour….batter CANNOT be sticky!
When incorporated, take a large T of dough and roll into a log. Bring the two ends together to form a doughnut-like shape and place on ungreased cookie sheet. Let rest for 10 minutes at room temperature before baking. 15-17 minutes at 350 degrees.
Glaze
½ pound confectioner’s sugar
½ cup orange juice
½ tsp vanilla
Blend all ingredients until you get the consistency of heavy syrup. When cookies are done, dip each one while still hot and place on dish. Sprinkle with candy confetti.
And now the Gluten-free Version!
I combined the following ingredients in my Cuisinart food processor:
1/3 cup sugar
1 ½ sticks butter, softened
3 organic eggs
1 tsp vanilla
½ cup orange juice
Then to the bowl of the food processor, I added:
3 cups gluten-free flour (Cup4Cup)
3 tsp baking powder
I allowed the food processor to do the work for me (arthritis dictates this move!)
However…
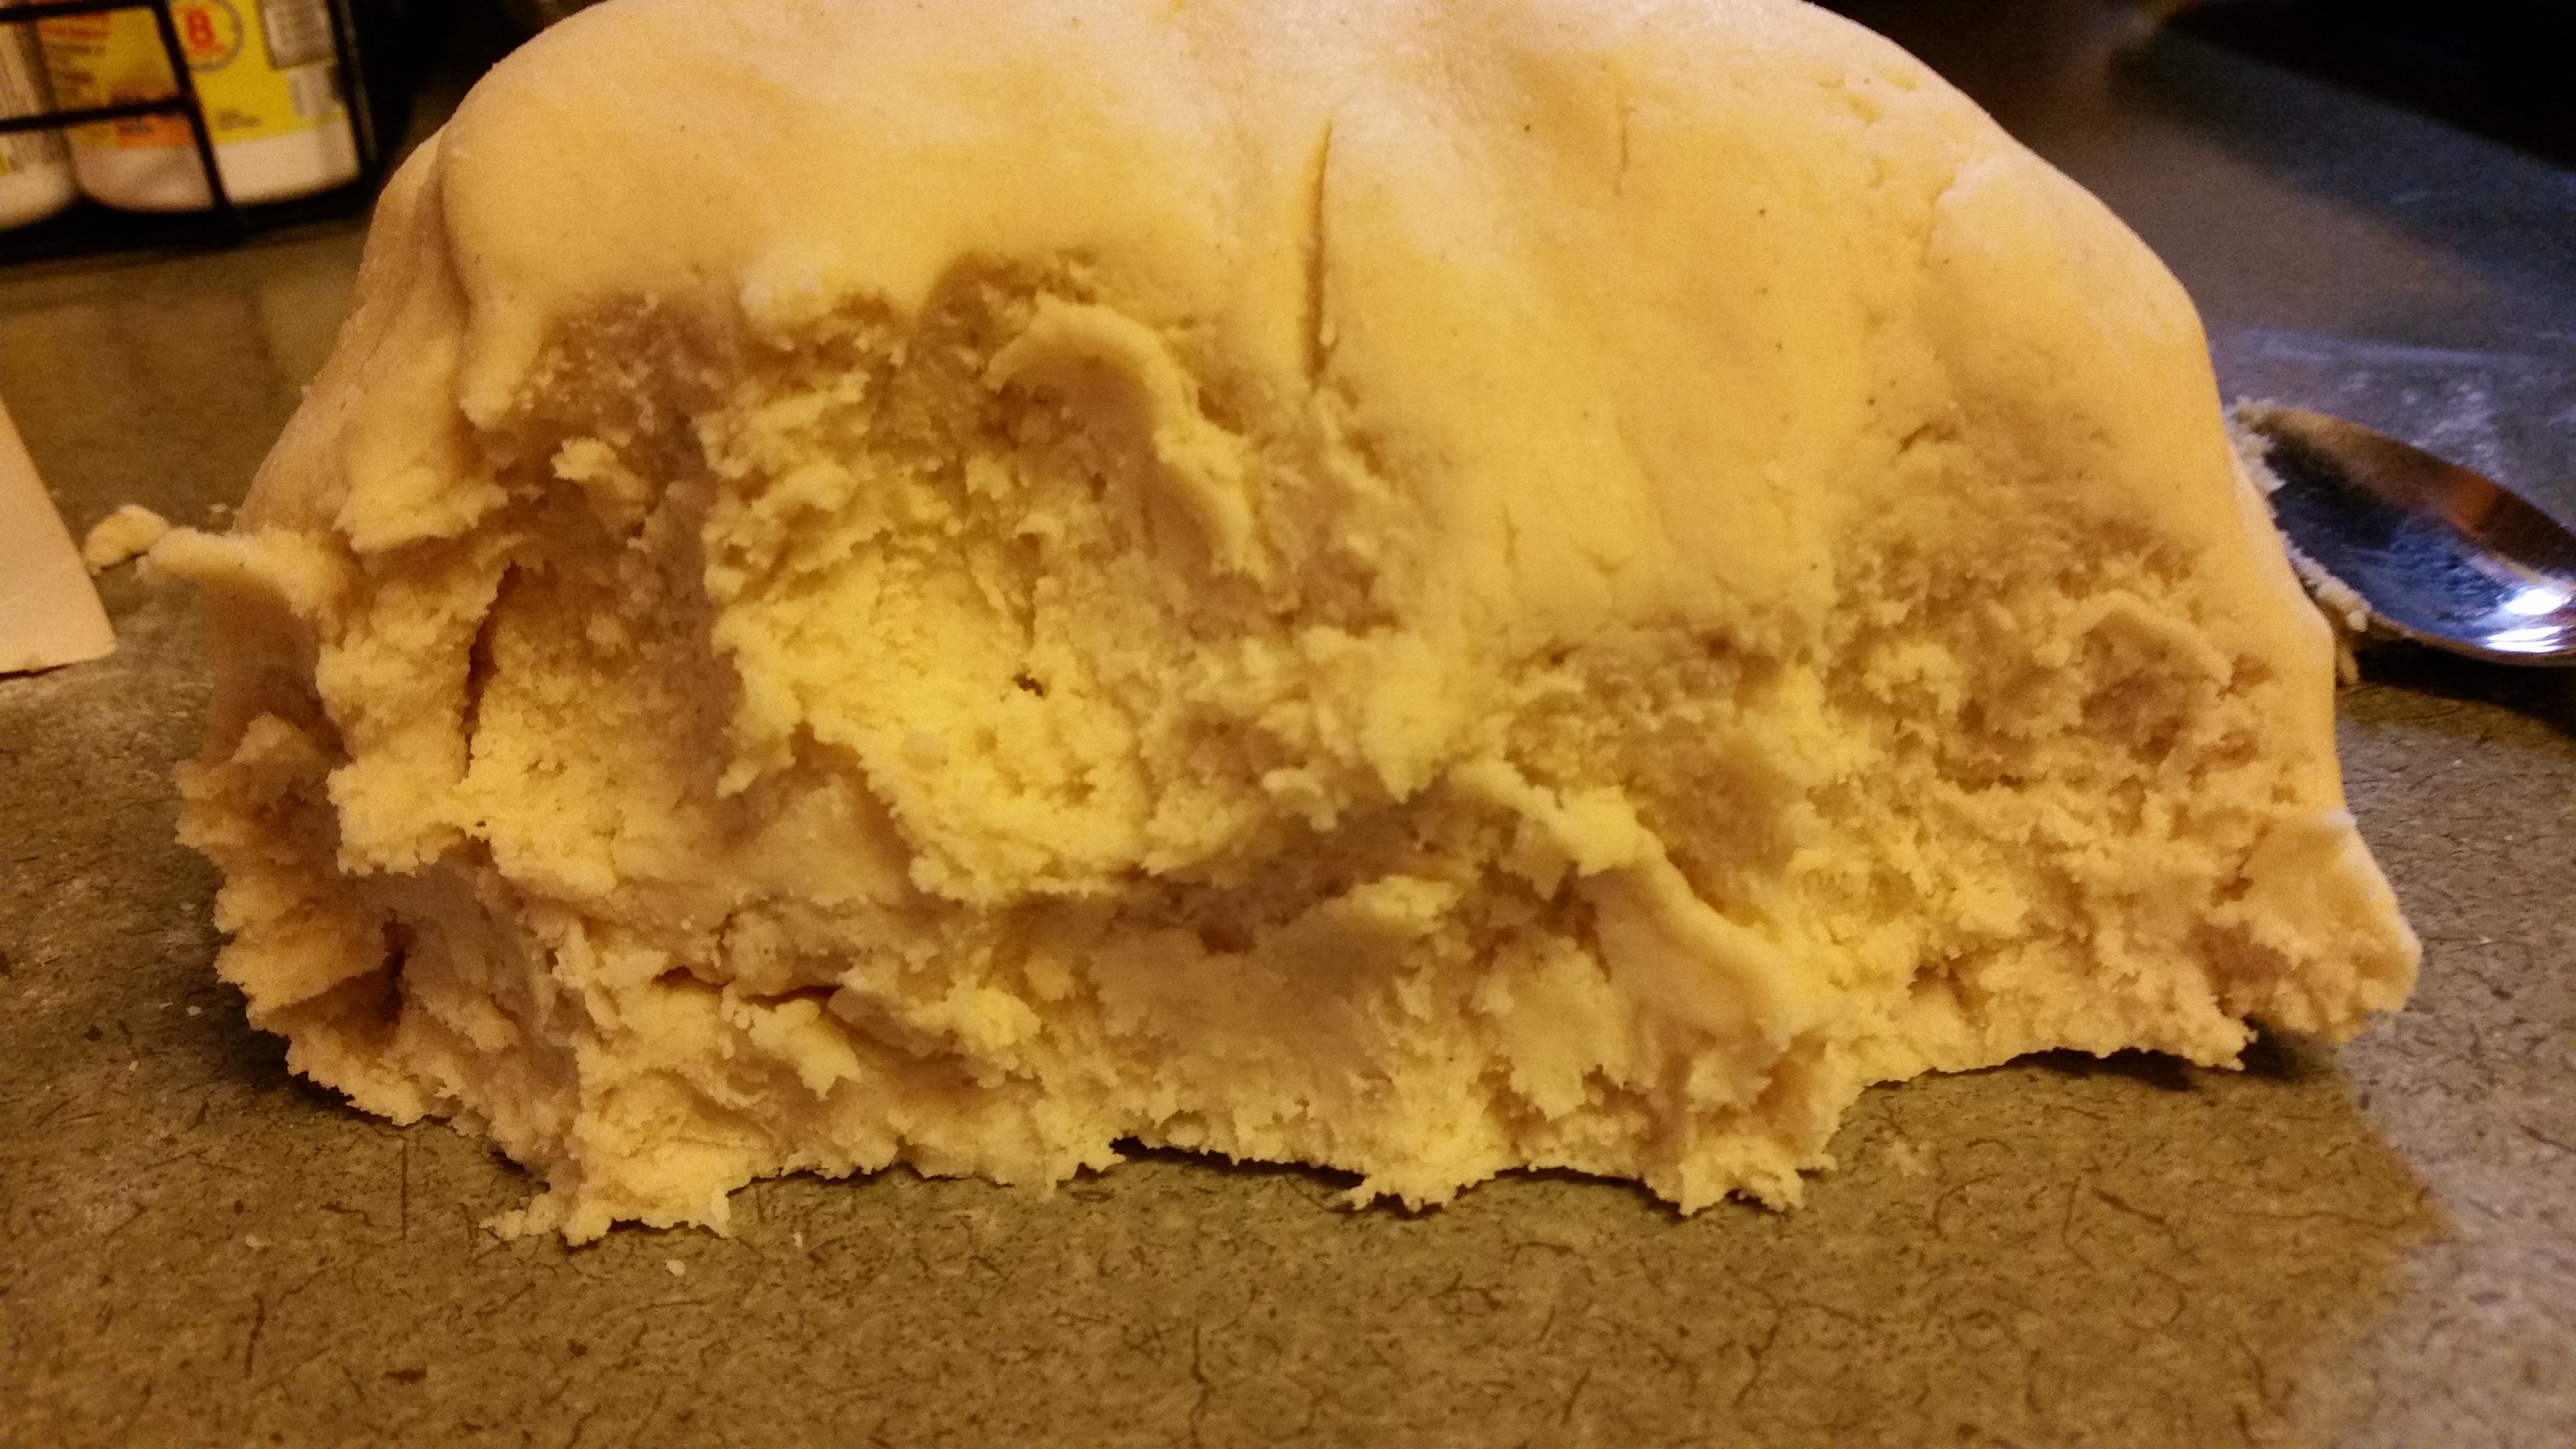
The dough was so sticky that I added ½ cup more of gf flour;
and then added ½ cup more of gf flour;
pulsed it all and at this point I turned the sticky mixture out of the bowl and onto the countertop.
Heeding the advice: “Knead thoroughly; if batter is sticky add more flour….batter CANNOT be sticky!”, I then added ½ cup more of gf flour and kneaded by hand, adding an additional amount until the dough was usable! I used way more than 3 cups of gluten-free flour total!!
At some point, I also added a few drops of Orange extract because I was concerned that the huge amount of extra flour had diminished the flavor!
It worked!
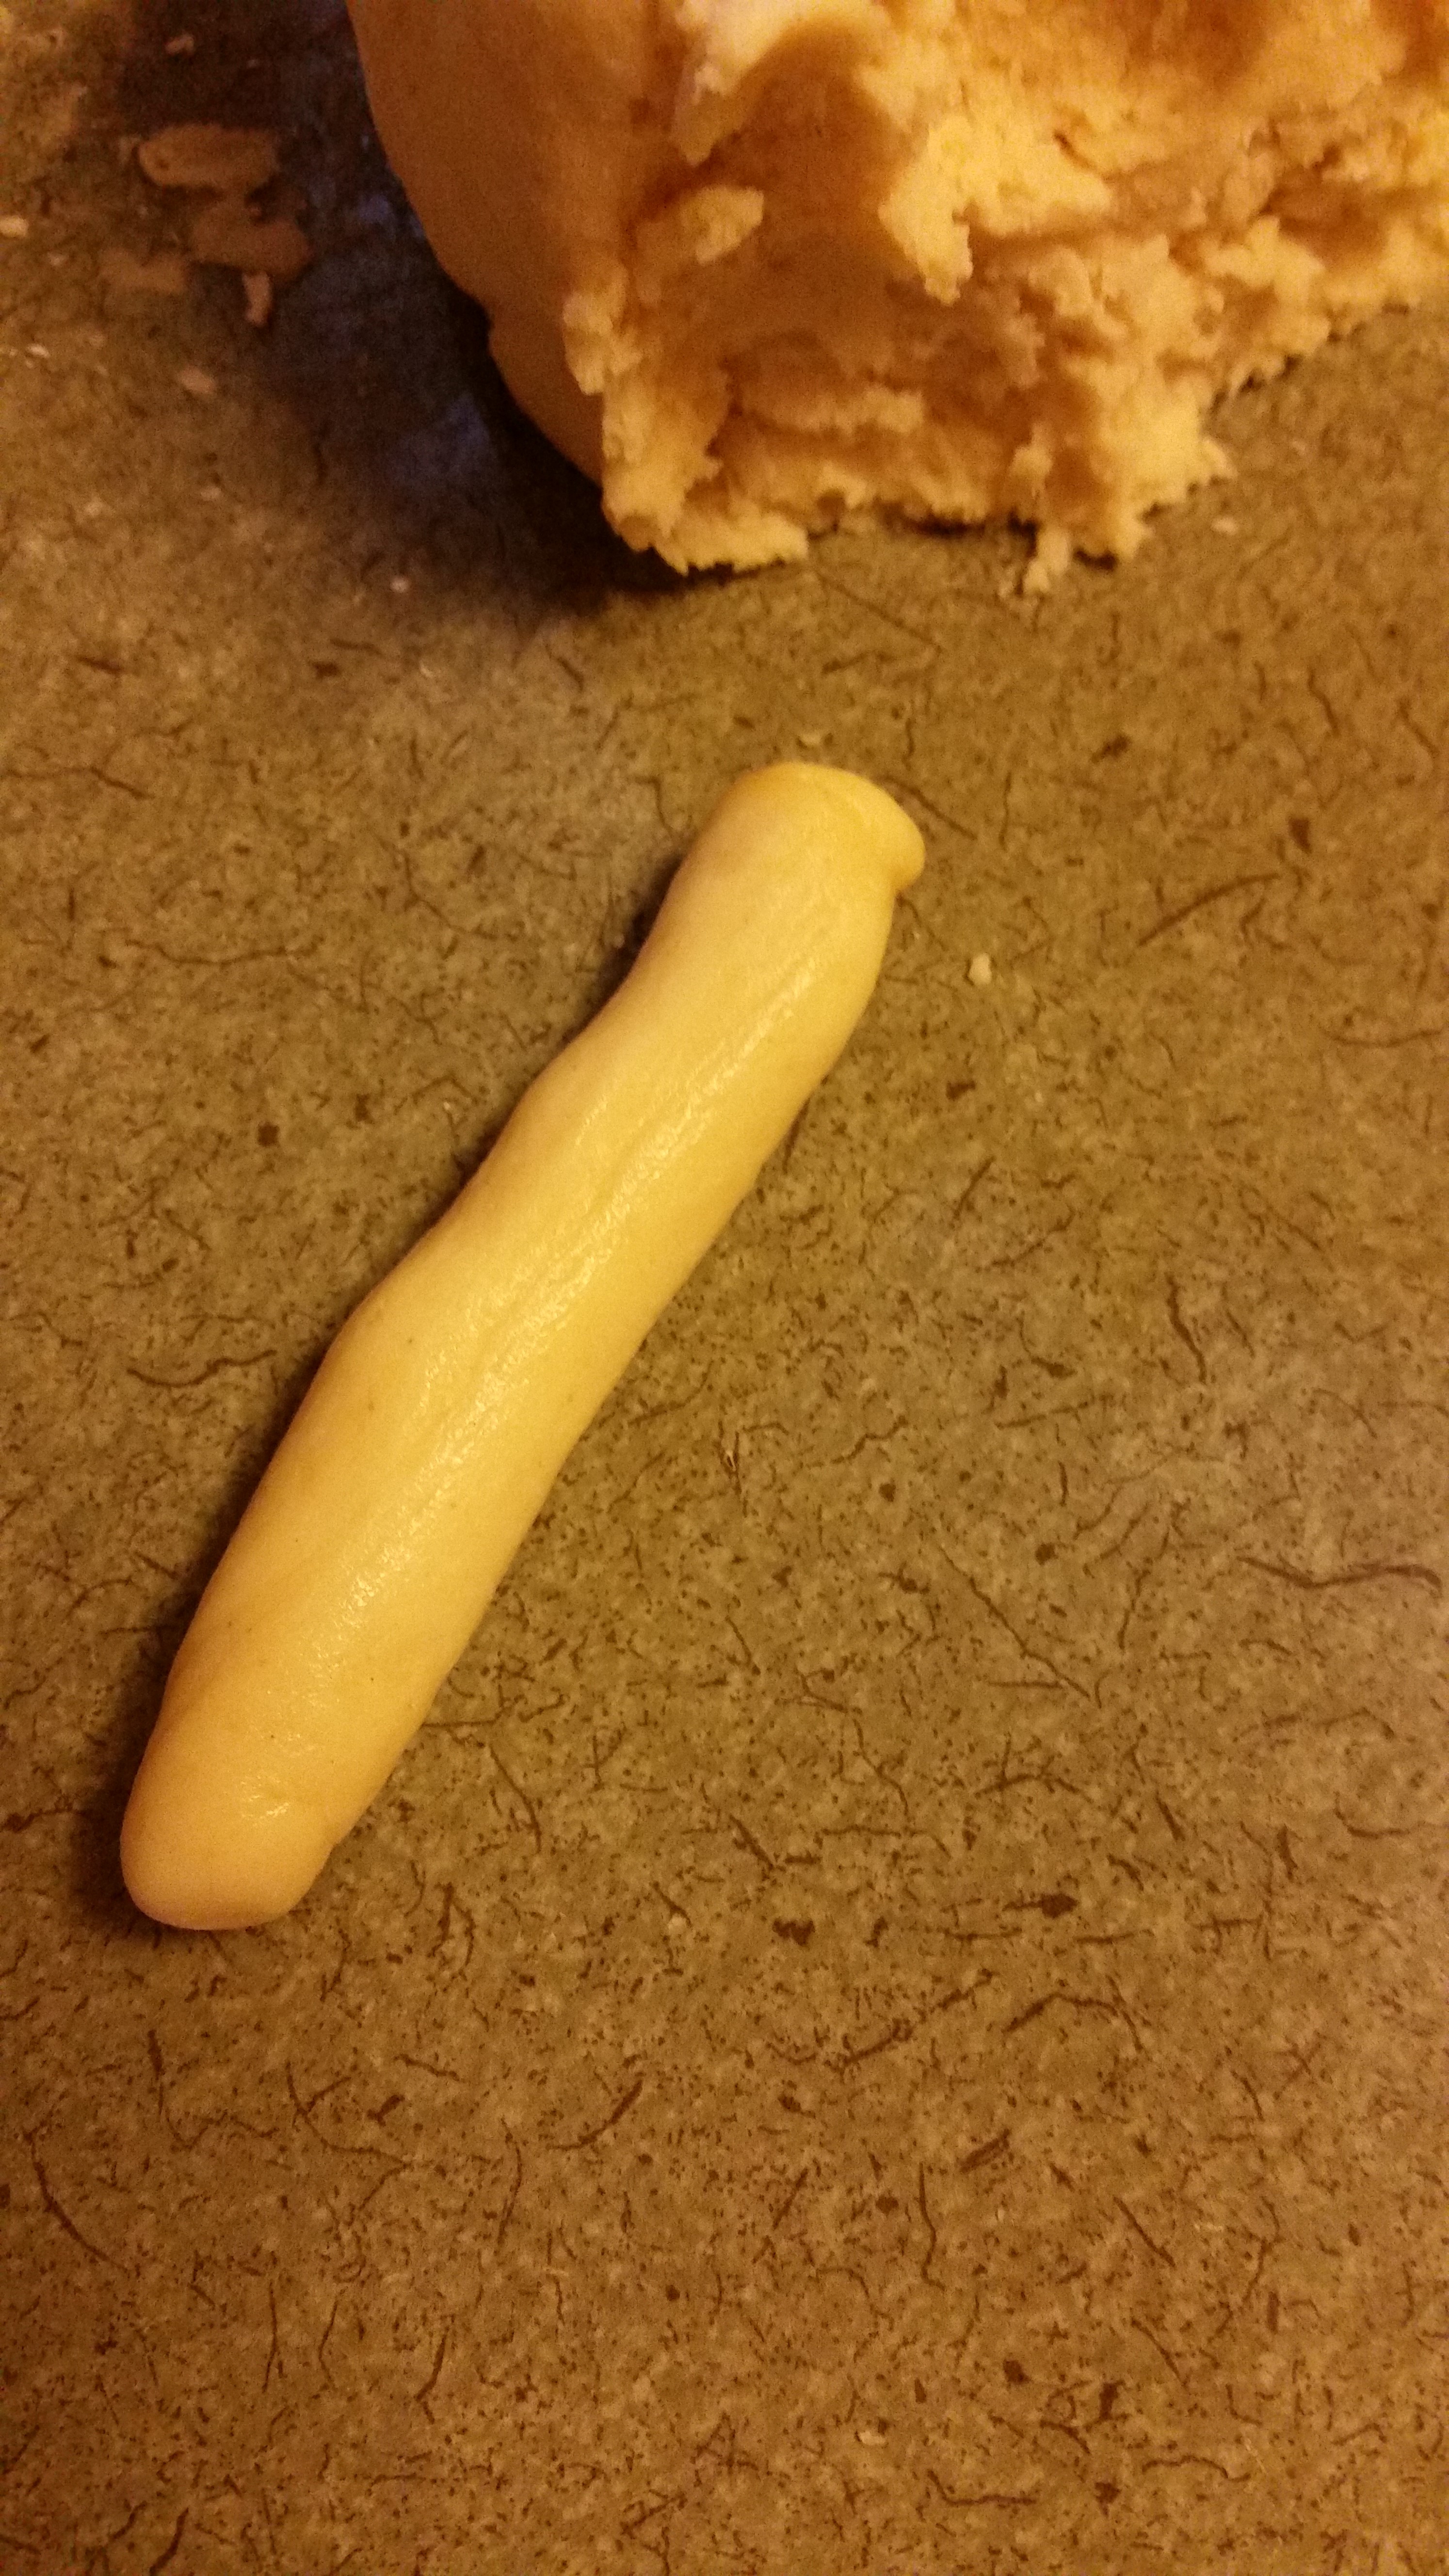
When incorporated, I followed the original directions and took a large T of dough and rolled into a log.
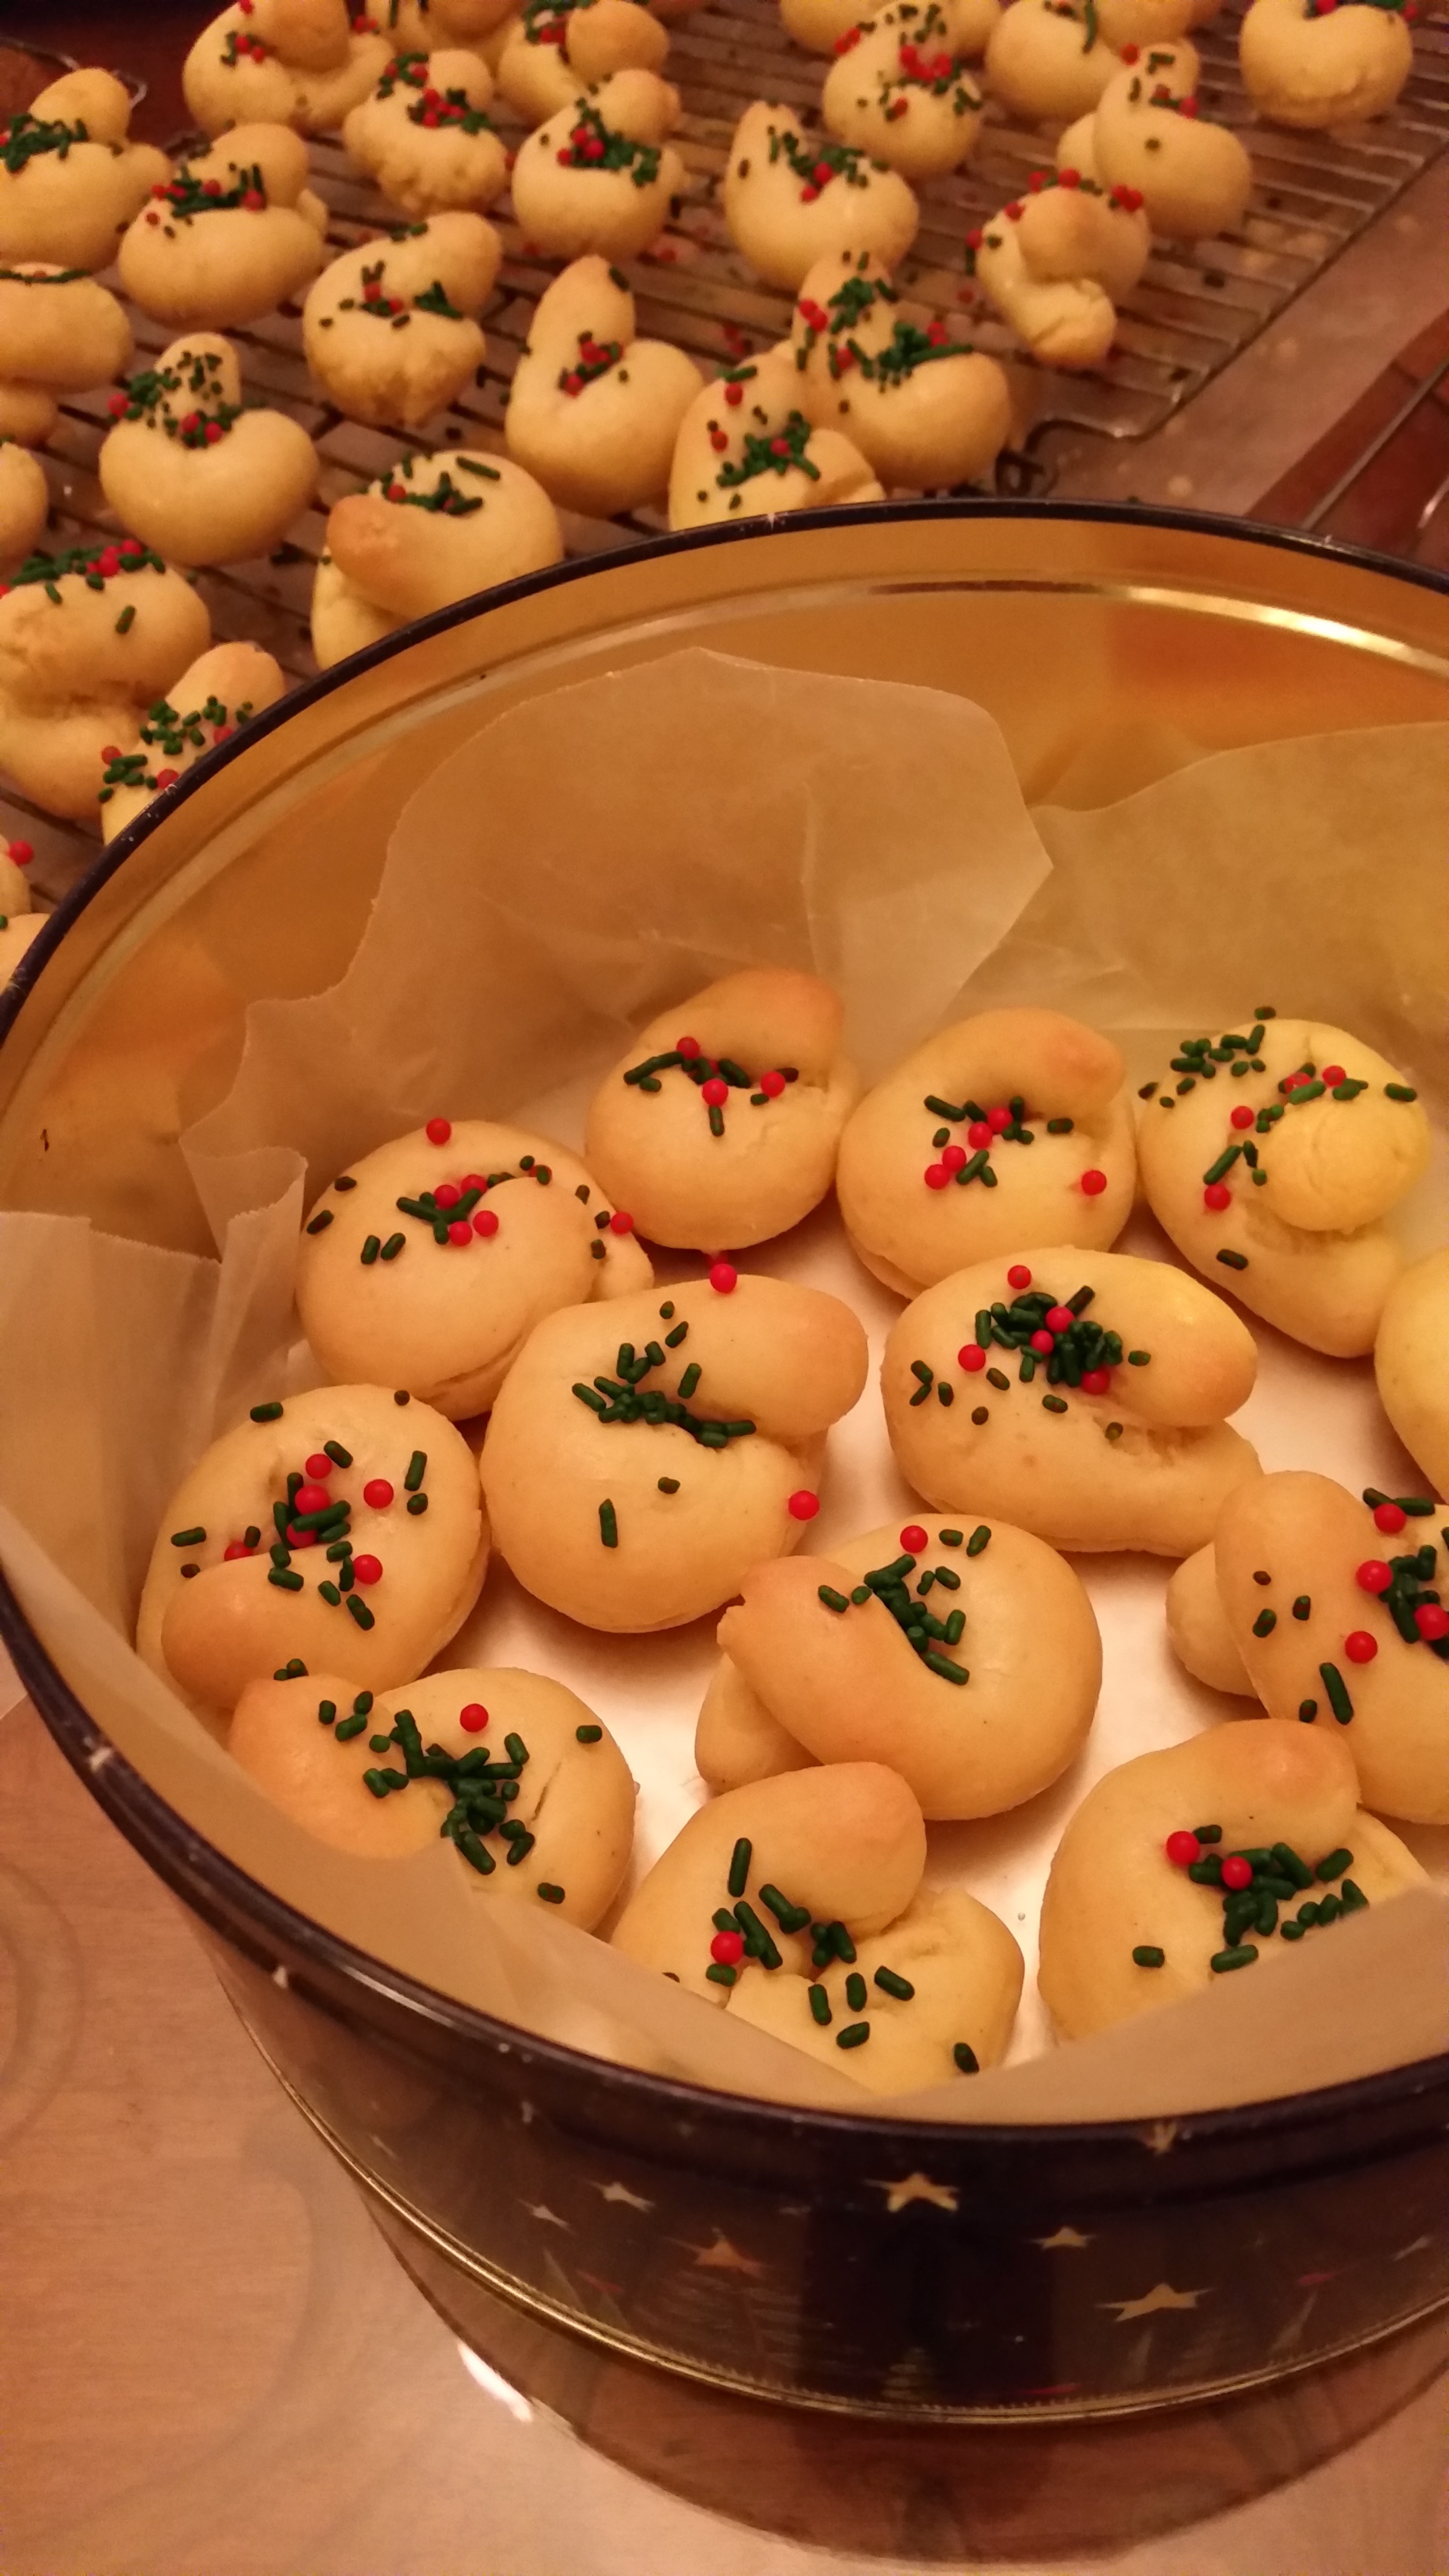
I brought the two ends together and formed a doughnut-like shape and place on cookie sheets lined with parchment paper
(how some things change!).
I let each batch rest for 10 minutes at room temperature before baking.

15 minutes at 350 degrees worked perfect!
Gluten-free Orange Glaze
½ pound organic powdered sugar
½ cup orange juice
½ tsp orange extract
Whisked all ingredients into a heavy syrup, and when cookies were done, I dipped each one (while still hot)
and placed on wire rack to cool. I then sprinkled with Christmas sprinkles.
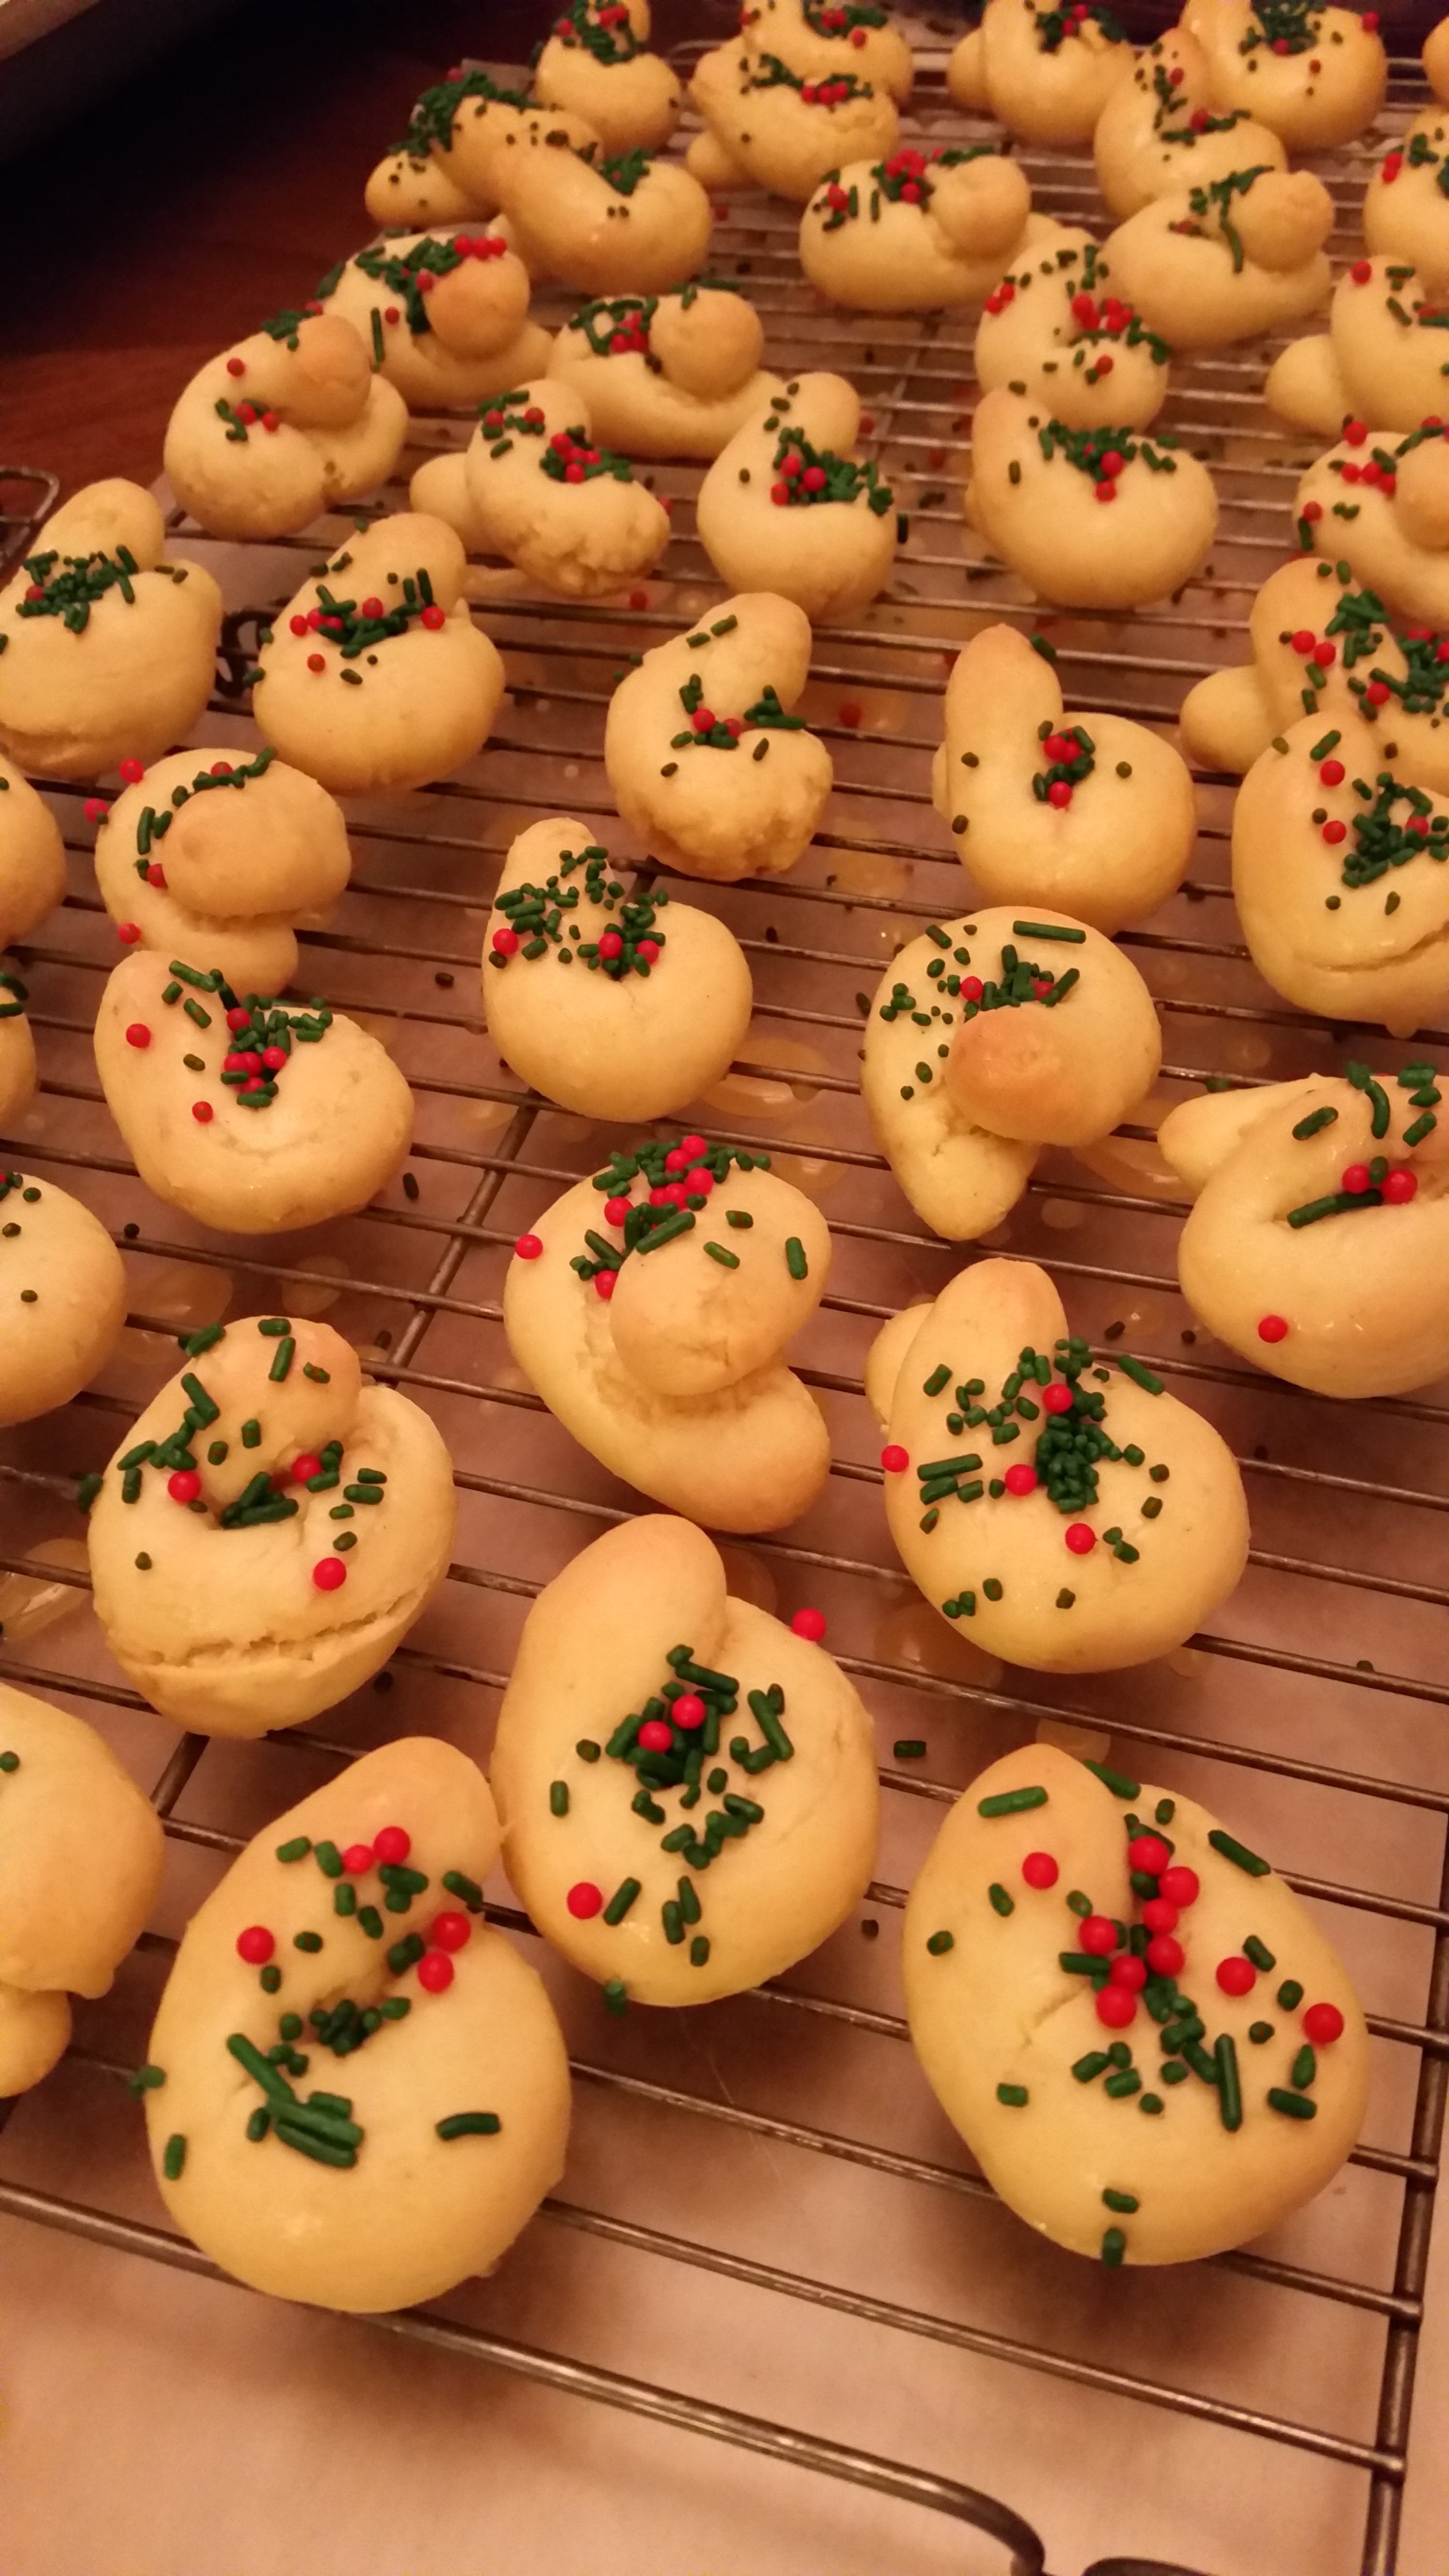
Yield: 4 dozen
So, while the flour amount may vary according to your dough stickiness….you really need to try this recipe!
Once I was able to have my hands free of sticky dough, it was fun rolling and shaping these cookies!
Better yet, it was fun eating them!
They are a perfect accompaniment to a cup of coffee or tea…they have a wonderful biscuit-like consistency
and the orange flavor just takes them up a notch!

Hope you all had a wonderful Christmas and wishing you a Happy 2016!
Enjoy!
© 2015, Monica of glutenfreedoubletalk